Showing posts with label happy holidays. Show all posts

Thursday, December 29, 2011

new year, new start

Hey everyone! Remember us? Kate? And Ruby?

Sure you do.

We weren't gone that long.

I am P-U-M-P-E-D about this new year as I've got some big plans for myself and this blog. Plans that include new projects, mood boards, travel, savings, an iPad, relocation, perhaps some cable... Well, probably not cable but you get the point. I'm going big time and, after spending the last two days being a giant slug, I can't wait to get started.

While New Years Eve is probably the most overrated holiday of the year, I can't help but wake up the next day and breathe a sigh of relief. Relief that it's a new year. A clean slate. A fresh start. It's during this time you can take everything you did you weren't exactly proud of, toss it off a cliff and move on. Where you can take all the dreams and goals you've ever had for yourself and figure out how to make them a reality. Where you can forgive all those that have hurt you over the years and give them the same second chance you're planning on giving yourself. I don't care if it's the cornball way of looking at things, these thoughts are what keep me happy and forever optimistic about the future.

And speaking of fresh starts, I received a truckload of presents over Christmas that will help me do just that. Here's a sneak peek at the kind of loot I'm talking about and my way of wishing you good fortune in 2012. Stay tuned and looking forward to what this year brings!

Tuesday, December 13, 2011

twelve days of christmas: day five


SPOILER ALERT: If you're part of the weekly lunch crew, please don't read this post unless you're fine with seeing your christmas presents before you actually get them. Sorry ladies, I'm on a schedule that doesn't involve a backup plan. Meow.


Before getting into the fifth day of Christmas, I promised my mom I'd share some photos of my company's holiday party, shot by The Framester. And what my mom wants, my mom gets. Especially when it comes in the form of an order. I'm a GIANT fan of photobooths. So much that if I happen to see one, I make whoever is with me run in for some strategically planned candid shots. Jim, being used to the drill, decided to go a little more sporadic which completely threw me for a loop. As you can tell by the first shot, I'm not exactly the best at improvising.

swooping me up right before the shot

Not quite ready...

yep, much better

keepin' it real

Fun, right? I know, we're adorable.


Now that that's out of the way (you're welcome mom), on the fifth day of Christmas my true love gave to me...

Five cocoa jars and mugs. 

I've been ON FIRE with the crafting these days I'll-tell-you-what. Between the dollhouse, the holiday decorations and the christmas gifts I'm bring multi-tasking to a whole new level. I mean, who needs sleep or a social life? Apparently not this girl. Which is exactly why I wanted to give 'ma ladies a little something this season. To remind them I'm still alive.


Each week (lately, month) a group of us gals meet up to try out either 1) a new restaurant we've never been to before or 2) a favorite restaurant we needed more of in our lives. This serves as an excuse to catch up, get out of the office and splurge on something spectacularly delicious. 

Not much of a cook, I opted for something even I could pull together that still yummy, indulgent and comforting. Cocoa! And for those not knocked up, spiked cocoa.

To start, I grabbed some glass mason jars, washed and let dry.


Second, I grabbed the ingredients needed for the Supreme Cocoa Mix recipe on Food.com and mixed them all together.


4 cups nonfat dry milk powder
1 1/2 cups sugar
1 cup non-dairy coffee creamer
2/3 cup unsweetened cocoa powder
1 (4 ounce) package instant chocolate fudge pudding

Finally, I topped some Ghirardelli chocolate chips and marshmallows to finish the look.


For the mugs, I found some heavy, white ceramic mugs at Target. I'm more of the classic mug kind of gal but you can choose which ever ones best suit your style. I picked up some markers made for porcelain or china (found at Michaels). 


As you probably noticed, my friends and I kind of have a small obsession with cats. Long story short, we like to find cats dressed or or doing odd things and often include in the email chain deciding where we're going to eat. We also equate whining with meowing and typically call each other out when doing just that. I went through rounds and rounds and rounds of cat sketches, meow typefaces and even "funny" sayings. Inevitably, I came back to just a simple meow which I think completely explains the sentiment I was trying to get at. 


They're cute, they're yummy and deliver the message of "let's stay friends and keep eating lunch together" perfectly. And for those nosy ladies that disregarded my spoiler alert and kept on reading:


The Rest of the Bunch:
twelve days of christmas: day two
twelve days of christmas: day one

twelve days of christmas: day four


On the fourth day of Christmas, my true love gave to me...

Four mantels I'm jealous of.
Let's face it folks, mantels are hard. Too little and they look like you just moved in, too much and they start making you feel claustrophobic. Such is the case with holiday mantels.

To make sure yours doesn't fall into the "uh-oh" category, be sure to follow these two rules.

1. Stick to one theme. I know, I know, Christmas is full of great themes and it's SUPER hard to decide on just one. White Christmas. Winter Wonderland. Santa's Workshop. Candy Cane Express. Christmas Village. I know (and have tried) them all. But not all at once. White Wonderland Workshop Candy Cane Village? I don't think so. Pick a single idea and execute against it. It'll be much easier on the eyes and your guests (and family) will thank you.

2. Don't forget to edit. The key to accessorizing a mantel is to follow the same rules you would accessorizing an outfit. First, decorate and adorn based on selection and what you want to accentuate. Next, swing by a mirror and take one thing off. However, in the case of a mantel, it's more like 3.


Here are some of my faves of the year.

[mix shiny and rustic then reuse in your outside landscape]
[potted herbs in a collection of porcelain dishware and containers]

[collection of vintage tinsel trees and all white stockings]
[NOTE: I'm officially starting to collect after seeing this photo]
[hgtv]
[framed chalkboard and rustic garland]
[NOTE: I'd skip the dream ornament and add some metallic
trees and ornaments instead]

[quirky and fun with even some presents for opening]


The Rest of the Bunch:
twelve days of christmas: day three
twelve days of christmas: day two

Tuesday, December 6, 2011

holiday decor tips and garland diy.

There's a fine line between spreading a little holiday cheer and glopping on the winter wonderland. Here are 5 tips to make sure you don't go overboard (even though I always want to).

1. Don't forget about the fabrics. Instead of relying solely on the Christmas chotchskies, try adding some Christmas fabrics to your motif. Get a couple of new decorative pillow covers or add a colorful blanket. I went a little rustic with plaid and cherry red but other ideas include a wool blanket and red velvet covers or maybe a bright fleece blanket paired with ski lodgesque covers. The options are endless!


2. Don't forget the windows. No, I'm not talking decals. I found this idea on pinterest (obvs) and recreated with scrapbooking paper. The craft is easy - just pick up some holiday scrap booking paper (I bought two $4 packs from Michaels) and some yarn for connecting and you're ready to go.

First, cut various sized circles out of the scrapbooking paper. Next, take three circles (small, medium, large), glue together and place inside a book so they dry flat. Once dry, lay out a pattern (random or organized) and just tape to the yarn.

Note: make sure to tape the yarn to the top of each circle so they don't flip over


3. Keep it simple in the bedroom. Normally I don't even decorate my bedroom but I saw this fur ball garland and I couldn't help it. To keep super minimal, I stuck with a couple white decorations and added some ribbon and a small bulb to my aloe plant. You can also do things like replacing a few photos on a photo wall, adding a wintery blanket or displaying a favorite mug on the nightstand. 


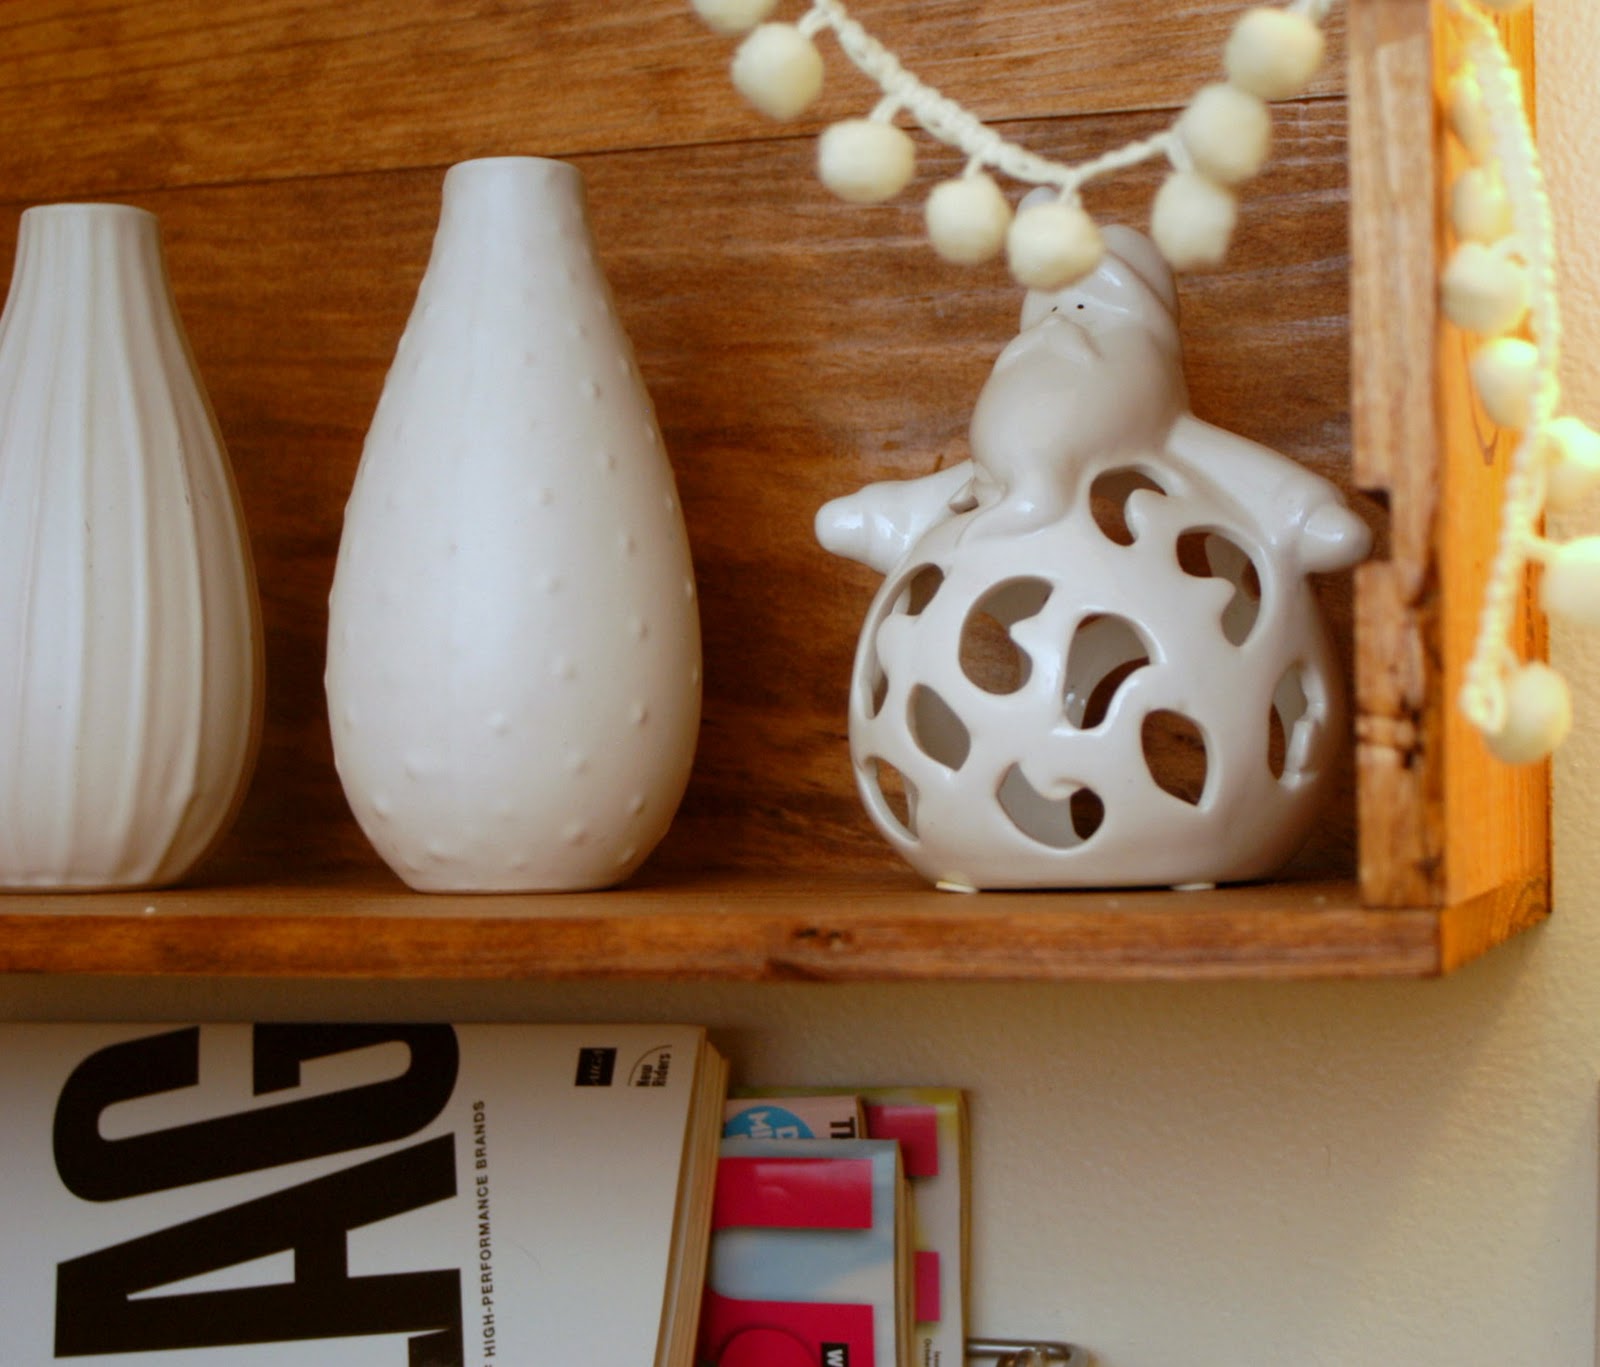
4. Same goes for the bathroom. You won't find any Christmas hand towels or toilet covers in this apartment. Add a couple of Santas, some leftover garland and call it a day. If I had more space, I may have changed out the plant to something a little more wintery. And if I had more money and an all white bathroom, I may have purchased these vases and tied some ribbon around the tops.


5. Keep it light hearted. When all else fails, find and place decorations that make you smile, laugh and enjoy the holiday season. Add a cheesy dog stocking, a hidden snowman in a sea of herbs and oil chaos or a tiny tree on top of your workspace. Holiday decorations are all about getting you in the Christmas spirit so do whatever it takes to make it happen!


tree trimming tips and diy ideas.

It makes me sad when I see a poor Christmas tree not properly arranged. He's there. He's bear. It's disheartening. Here are 5 quick tips for layering, filling and displaying ornaments so your Christmas tree can stand proud and loud over the holidays.

1. Pick a color palette. Not saying all of your ornaments need to follow suit but choose a palette that will be consistently displayed throughout the tree - mainly through filler bulbs and an occasional decorative ornament. In my case, I kept it traditional with red, green, lime and metallics.


2. Vary shapes and sizes. In my humble opinion, Christmas trees can look a little dull if all the ornaments are the same size and shape. Plus, there will be a variety of nooks and crannies you'll need to fill along the way. Trying to stuff a giant bulb in a tiny hole or ignoring the fact that the hole exists should both be non-options. For mine, I have a giant mis-mash of things from small bulbs to big snowflakes to icicles to animals. The more variety, the better position you'll be in. Not sure where to shop? I've gotten ornaments from all over. Target has a great selection of bulbs, Michaels is bulk snowflakes and World Market has an incredible selection of separates.


3. Mix old and new. As if I'm not sensitive enough, I get all Sentimental Sally over the holidays. Thinking of family, great memories and new beginnings. It probably gets really annoying to those that aren't the same way. With my tree, I try to choose ornaments to give off those same feelings. Man, I'm such a sap.

For the old, I've been fortunate enough to inherit my +grandmother's snowflake ornament collection along with some other, more random decorations that were my favorite growing up. I've also collected the old metallic bulbs my mom used to decorate our Christmas tree with when I was a tot. While I use them as fillers, it reminds me of just how particular I was even at a young age.


For the new, I make it a goal to buy at least one new ornament a year that reflects a certain milestone or memory within that year. This year I picked up a stellar mosaic tile bulb from The Sarah Center Holiday Sale and a San Francisco trolley car from our family vaca earlier this year. I also have a Ruby slipper
from the year I got pup. Awww...


4. Get your craft on. On top of the new purchased ornaments, I decided to make a few extras because of some DIY ideas  posted to pinterest. I made glitter dear compliments of a Martha Stewart tutorial and glitter bulbs compliments of the same tactic. I saw a couple other ideas for glitter bulbs I liked but, being heavy handed with the glue, they looked awful. Visit my pinterest board for loads more DIY ornament ideas.  


 5. Trim in order of shape and size. Lastly but probably the most important, get prepared to trim the tree. The goal for trimming? Fill those holes! Start out by organizing your ornaments according to shape, size and purpose (filler or show pieces). For those that use garland and/or sprigs of berries or other decorative trimming, be sure to add that first so you can make sure it's evenly distributed and resting on the tree instead of an ornament.

For those going straight into ornaments, I typically start by hanging my small, circular bulbs first. I distribute evenly across the tree (don't forget the back!) in the most noticeable holes, varying the depth of placement to allow room for layering. Next, I hang the bigger bulbs and assign to the larger holes that still aren't fully filled in. Usually this are hung within the inside of the tree since the branches are naturally less full toward the trunk. From there, I hang my more decorative fillers (oblong, icicles and colored snowflakes), continuing to fill and evenly distribute across the tree. This is the point where a lot of stepping back, switching locations and swapping ornaments happens.

Finally, I take all my one-of-a-kind ornaments and arrange in the places they can be most easily viewed. My favorites go front and center and the rest go on the sides.


Monday, December 5, 2011

decorate for christmas, check.

I'll keep this short and sweet. It's Christmapalooza this week because I'm SUCH a fanatic about the holidays. Frosty. Kris. Rudolph. Cindy Lou Hoo. Love them all. The whole gang.

So every year, on the first Sunday of every December, I pull all of my decorations out of storage, flip on the Pandora Christmas station, grab a bottle glass of wine and get cracking. Plus, this year, I opted to make a few extra decorations to add to the chaos. My mom will be so proud.

Here's where I ended up. Keep your eyes out for tips, tricks, how tos and even more ideas throughout the week!