Showing posts with label emily henderson. Show all posts

Friday, December 9, 2011

twelve days of christmas: day two


On the second day of Christmas, my true love gave to me...

Two lovely blogs.

Since Saturdays are typically all about spreading the love throughout the blogosphere, I figured I'd keep it going throughout the series. These two blogs in particular are exciting for me to share because I idolize these ladies. They're both have such a refreshing personality (at least in their blogs), fearless style and unapologetic opinions that are completely, 100% their own. I admire their drive, confidence and intensity and I hope that one day we can be friends. Or swap closets. Whatever. Same diff.

#1: Emily Henderson


#2: Design Love Fest


The Rest of the Bunch:

Wednesday, November 2, 2011

if i had a million dollars.

Being in la-la land for the I'm a Giant Dollhouse Challenge is both exhilirating and non-productive all at the same time. Exhilirating because there are no budgets in the land of miniatures, and non-productive because all of my other projects/to-dos are on hold indefinitely. But who cares because I heart making tiny, little things!

As a brief reminder for those that haven't been keeping up with my two (2) updates on the matter, I'm participating in Emily Henderson's I'm a Giant Dollhouse Challenge and have been seriously getting after it on some dollhouse building. I'm planning on an update tomorrow so get ready to be amazed.

In the meantime, let me show you some of the photos I've been drooling over while playing the "if I had a million dollars" fantasy game. It's the perfect game for designing a dollhouse and one I can't seem to stop playing. Not even to craft. I KNOW.

a clawfoot tub and custom chandy for the bath

an open kitchen for someone else to cook in

vintage Saarinen tulip chairs

custom factory window and stone shower

a library

these chairs

this pool

Thursday, October 27, 2011

dollhouse challenge mini update.

You know the saying "don't bite off more than you can chew"? Well, I tend to ignore these wise little words. Maybe it's because I over think. Maybe it's because I over commit. Maybe it's because I'm not over-ly smart. Whatever the case, more often than not, I say screw the wading pool and head straight for the deep end.

Such is the case with the I'm a Giant dollhouse challenge I entered and, thanks to this post, have no way out of without looking like a quitter. Sigh.

I thought this was going to be a little project, with a little house full of little things. Just something small, cute and adorable to keep things interesting. But somehow, some way, this little, cute, adorable project turned into a big, giant, hairy monster that involves me building a little house and constructing all of the little things one. by. one. Looking back, I'm sure I can blame this on me being a cheap perfectionist. I mean, who has $20 to throw down on a tiny sofa you'll never actually be able to sit in and enjoy? No sir, not me. I'd much rather throw it away on more important things like beer and shoes.

Anyway, this project is taking WAY longer and involving WAY more planning and mathematics than I could have ever imagined. A word from the wise, making midget things involves rescaling. Everything. So instead of busting out the bottom floor like I so stupidly thought I could do, this week I completed this:


Since this project involves math, I had to head back to the floorplanner and actually write down the measurements of everything so I could shrink it down accordingly. Then I had to think about things like windows and doors and ceiling height. OH MY.

So I grabbed the card set boxes I swiped while visiting my parents last weekend, secretly thanked them for previously owning a baseball card store and cut out the base floor and walls based on my new-found measurements. Here is the new floorplan I'm working with for the ground floor.


It's a little more condensed, a little more simple and a lot less work than the before (posted here).

Side note: Does this or does this not look like a cow head? If I would have realized this growing up, I would have had a field day playing around in the back office/storage space. Especially since the foam set box fillers we had were green. Hello, pretend farm.


So after measuring (twice, grandpa) and cutting and taping and researching, I ended up with this:


The base of the outside walls (not shown) and ground floor. I know, CRAZY productive right? Double sigh.

I still need to cut the windows and doorway in it along with finding a way to add more stability (I'm thinking popsicle sticks). But this will come as soon as I figure out how high and large I want them. So, after the 5th yawn, I did what anyone would do - hopped online in search for sofas and tables that would be cute in midget size. For example, wouldn't these be sooo cute?


Whenever I finish procrastinating, next steps include:
  • add solid sheets of posterboard to cover the popsicle sticks, serving as drywall.
  • spray all the walls with some sort of neutral color spray paint (thank you, one room floorplan)
  • figure out a wood floor
  • stain the floor 
  • add white popsicle sticks around the floor and ceiling as molding (AKA additional stabilizers)
For the record, NONE of these tasks on the checklist above were there before. And I still have an entire second floor to figure out! Clearly I've dropped quite a load onto my plate for no apparent reason other than my love for tiny things. Hoping to have an actual calendar with deadlines, finish up this list along and possibly building out the kitchen furniture by the next post (November 10th)
Fingers crossed - December 15th is approaching faster than I thought it would!

Thursday, October 13, 2011

A dollhouse challenge for midget lovers.

Let's see, where shall I begin with this one.

I know - Emily Henderson started it. Not only do I love her, idolize her and very openly want to BE HER, I also happen to share her obsession with miniatures - especially when they come in the form of an art, craft or childhood dream.

So joining the I'm a Giant Blog Challenge I am hoping to indulge on some of that teeny, tiny fantastical goodness only a dollhouse could bring someone. My future will be ripe with baby ovens, midget couches and pea-sized accessories of which I will likely be making all of because I didn't exactly budget out taking on such a mighty challenge. 
Plus, what fun is it if you can't make it? And who wouldn't want to figure out how to make a little runt of a toilet that you can drop in your pocket when it's all said and done. NO ONE that's who.

So I, Kate, am taking advantage of the opportunity Emily so graciously served up to all us bloggers that have a fetish for dwarfed objects and a vivid imagination (and detailed plan) for their dream home. Other bloggers taking this challenge by the horns include:

Emily Henderson (duh)
Morgan from The Brick House
Erin from Design for Mankind
Orlando from Hommemaker
Corbett from Girl Domestic
Jenny from Little Green Notebook
Nicole from Making it Lovely
Kirsten from Simply Grove
and Emily from Go Haus Go


So let's get started.

First, since I will be making my dream home doll house from scratch, I need to get together a floor plan. Luckily, I've never had a strong desire to live in a mansion - no, not even while playing Life - so I can keep things modest and cute and... well... little. I'm thinking about making the whole thing out of cardboard but my backup plan is splurging on some balsa wood depending on my eventual needs for durability and strength. But for now, I'm just going to plan for cardboard since I am seriously that cheap about this whole thing.

Thanks to floorplanner.com (again) I was able to quickly mock something up to see with it would look like. On the first floor, I've always wanted an open plan. Something that's airy, highly functional and allows for easy TV viewing from any angle. Of course I'm going to add my flair to the design and decor but you get the general idea from the sketch below.


For the second floor, I want to keep it all about sleeping and working. A master bedroom complete with on-suite bath, guest bedroom and work space. I think it'd be cool to have a jack-and-jill bathroom connecting the two other rooms for easy... umm... access. (geez, what is WITH me and bathrooms these days?!?!) Again, there's a lot of furniture planning and stuff left to do but, aside from the obvious lack of closet space, I think the floor organization is practical and chock full of functionality and flexibility. 


The biggest issue I've been having is where to put the stairs. An open floorplan makes it a little tough to blend them into the rest of the space and a dollhouse leaves you with a missing entire-back-of-the-house so you can't exactly tack one on somewhere.

Anyway, the plan is to post about the progress every other Thursday until the December 15th deadline, showing you how it all (hopefully) comes together. In the meantime, feel free to follow my collection of inspirational photos, ideas and random thoughts on pinterest.

Yay dollhouses!

Wednesday, September 21, 2011

Going no headboard.

I'm continuing the headboard-less conversation I started up in yesterday's post. In my opinion, headboards should only be used if you want your bed to be the focal point or need some visual interest within your space. This just happens to be the case in most bedrooms. Mine, not so much.

Having a wall of frames and a busy and brightly patterned duvet, I didn't want to draw any more attention to my bed then necessary. I think the end result may have been different if I could have painted the walls but, since I had to keep them white (thanks, landlord), I was forced to think of ways to add subtle forms of visual interest while keeping the room design from being overkill.  In the end, not having a headboard helped balance the dramatic features and blend the various parts of the room's design.

For those with a similar issue, here are some other images to help lead you to a solution. Please feel free to contact me with questions!

The brightly colored wall and layered patterns speaks for itself.

This room was one of my inspiration rooms. I love it to pieces.

The layers of pillow and color almost acts as a headboard but keeps the polka dot wall the primary focus.

Another one of my inspiration rooms. Thank you Emily Henderson for this lovely space.


Or you can always do the window thing (also discussed in this post).
It's a great way to accentuate structural detailing or add some height.

Thursday, September 8, 2011

Wine crate shelf, complete.

Remember a couple days ago when I mentioned wanting to make a wine crate shelf for my bathroom (full post here)? Well, it's finished! And it's cute! And I can't wait to figure out what's actually going to go in it!


Can you tell how excited I am about it by my excessive use of exclamation marks?!?!


To recap for everyone, my rental has a very ugly bathroom with a very ugly vanity. It's large. It's boring. It's absolutely fugly.


First things first, I needed to balance out that bulk. And what better way to balance bulk than by enclosed shelving? Enter the $5 wine crate from The Wine Merchant.

NOTE: Excuse the crappy side angle photo - I remembered to photograph the progress only after I started to stain. D'oh!


I stained the crate with some $2 Ace-brand wood stain in Early American. It was my first time using the stain and I have to say I was rather pleased with it. The color went on really smoothly and the smell wasn't too too bad. I finished it off with some high-gloss polyurethane I had left over from another project and the up on the wall it went.


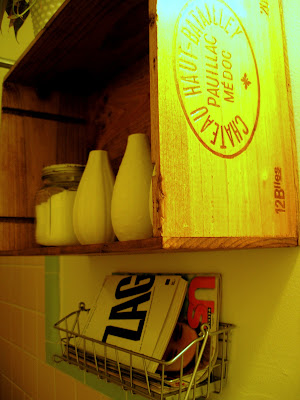
Here it is styled a bit from random chotchkies I had lying around my house. I'm not completely sold on the accessories but am definitely digging the all-white mix of modern and vintage pieces to really make a statement. Emily Henderson made a comment on her blog the other day about choosing to go eclectic by color or by style so as not to overdo it. I am definitely taking the direction to heart and plan to attempt eclectic by style in this here display.

TIP: Drill holes in the wine crate before attempting to mount it to the wall. I did this and completed the very technical exercise of balancing a level on top of the wine crate, pencilling in the holes to the wall and then looking through the little hole to match everything up. Soooo helpful.


Knowing me, I may add just a splash of color (something bright) based on what I find at the thrift stores but I want to keep it simple enough so it doesn't look like just a bunch of crap shoved up above the john. Right now I'm on the hunt for more white washcloths, a textured, ornate candy dish to use as a pot and a larger fern to go inside. I might add a metal basket to hang right underneath the shelf to hold some reading material for.. you know... when you need reading material.
As far as the rest of the bathroom? I have some ideas but none that seem to be tying everything together just yet. I'm thinking I need to keep down the textured-yet-simplistic look to balance out the green and pink tile.


UPDATED WITH ACCESSORIES:


Tuesday, June 21, 2011

I heart Emily Henderson (just like everyone else).

I'll keep this short and sweet.

Emily. Henderson.


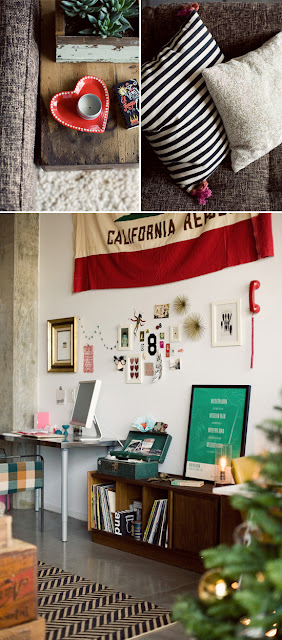
My obsession for her design continues to grow and grow and grow. She has such a fun, eclectic style - mixing classic and contemporary design into what seems like the perfect combination. A little girlie, very fresh and always interesting, I think it's Emily's attention to detail that continues to make me drool over her finished products.

Regardless, a photoshoot stylist, host of HGTV's Secrets From a Stylist and HGTV Design Star winner, this lovely lady is one to keep your eye on. And with her designs appearing on almost all of my searches, I just had to say something. Here are some rooms to show you what I'm talking about.


the winning design (@ peninehart)