Showing posts with label martha stewart. Show all posts

Tuesday, November 8, 2011

holiday ornament diy ideas a-plenty.

No matter whether the Christmas season is actually in the air or not, it's on my blog and I'm rolling with it. Mainly because I love the season, am slammed with dollhouse building and could use a little holiday spirit in my life. Plus my mom already has her "holiday theme" picked out and it's driving me nuts that she's ahead of me.

For those that don't know, a "holiday theme" starts with the tree. Unlike my mom, I tend to bypass the Pottery Barn pulled-together tree and head straight for The Christmas Story glittery, tinsel-filled mayhem.

Tacky, yes. A lot, of course. But it a good way.

So this year, like every year, I opt for homemade ornaments. I already have my signature super sentimental ornaments (+grandma) but I like to mix up the arrangement with some new duds from time to time. But what type of homemade you ask? These past few weeks, I've been collecting DIY ornament ideas off pinterest (duh) as a way to gather my thoughts. The good news is that majority of these ornament ideas are relatively easy (read: more likely to actually get done). The "bad" news? Let's just say it's going to be a lot of metallic, a lot of garland and a lot of glitter. Little fake Christmas tree from Walgreens circa 2009, you are going to look ADORABLE.

squeeze lines of Elmer's glue on glass bulb and sprinkle with glitter.

stick string in glue and wrap around small balloons
once dry, pop balloons and presto!

these would be cute even just spray painted, i swear!
but if you want to glitter, get hours of your life back by using spray adhesive instead of Elmer's.

pour white paint inside glass ball and swirl around until all sides are covered.
grab puffy paint (or acrylic if you're boring) and paint on the designs.

you don't have to use maps for this one. cut identical shapes out of desired material.
grab a Styrofoam ball, start from the bottom, secure with a hot glue gun and work your way up.

origami birds. ok, ok, these don't have to be glittered - maybe just some scrapbook paper.

collect leaves while they're still falling, let dry and spray paint gold.

this I would tweak to add a tad more contrast.
tape off half of the pine cone and spraying the tips lime green or red.

don't forget the garland!
grab some construction paper, holiday scrap booking paper, ribbon, scissors and a glue stick.

toilet paper roll slices, a glue gun and glitter
spray with adhesive and start circling 'round the ornament.
this may/may not be harder than it looks.

Thursday, October 20, 2011

jewelry to bead box.

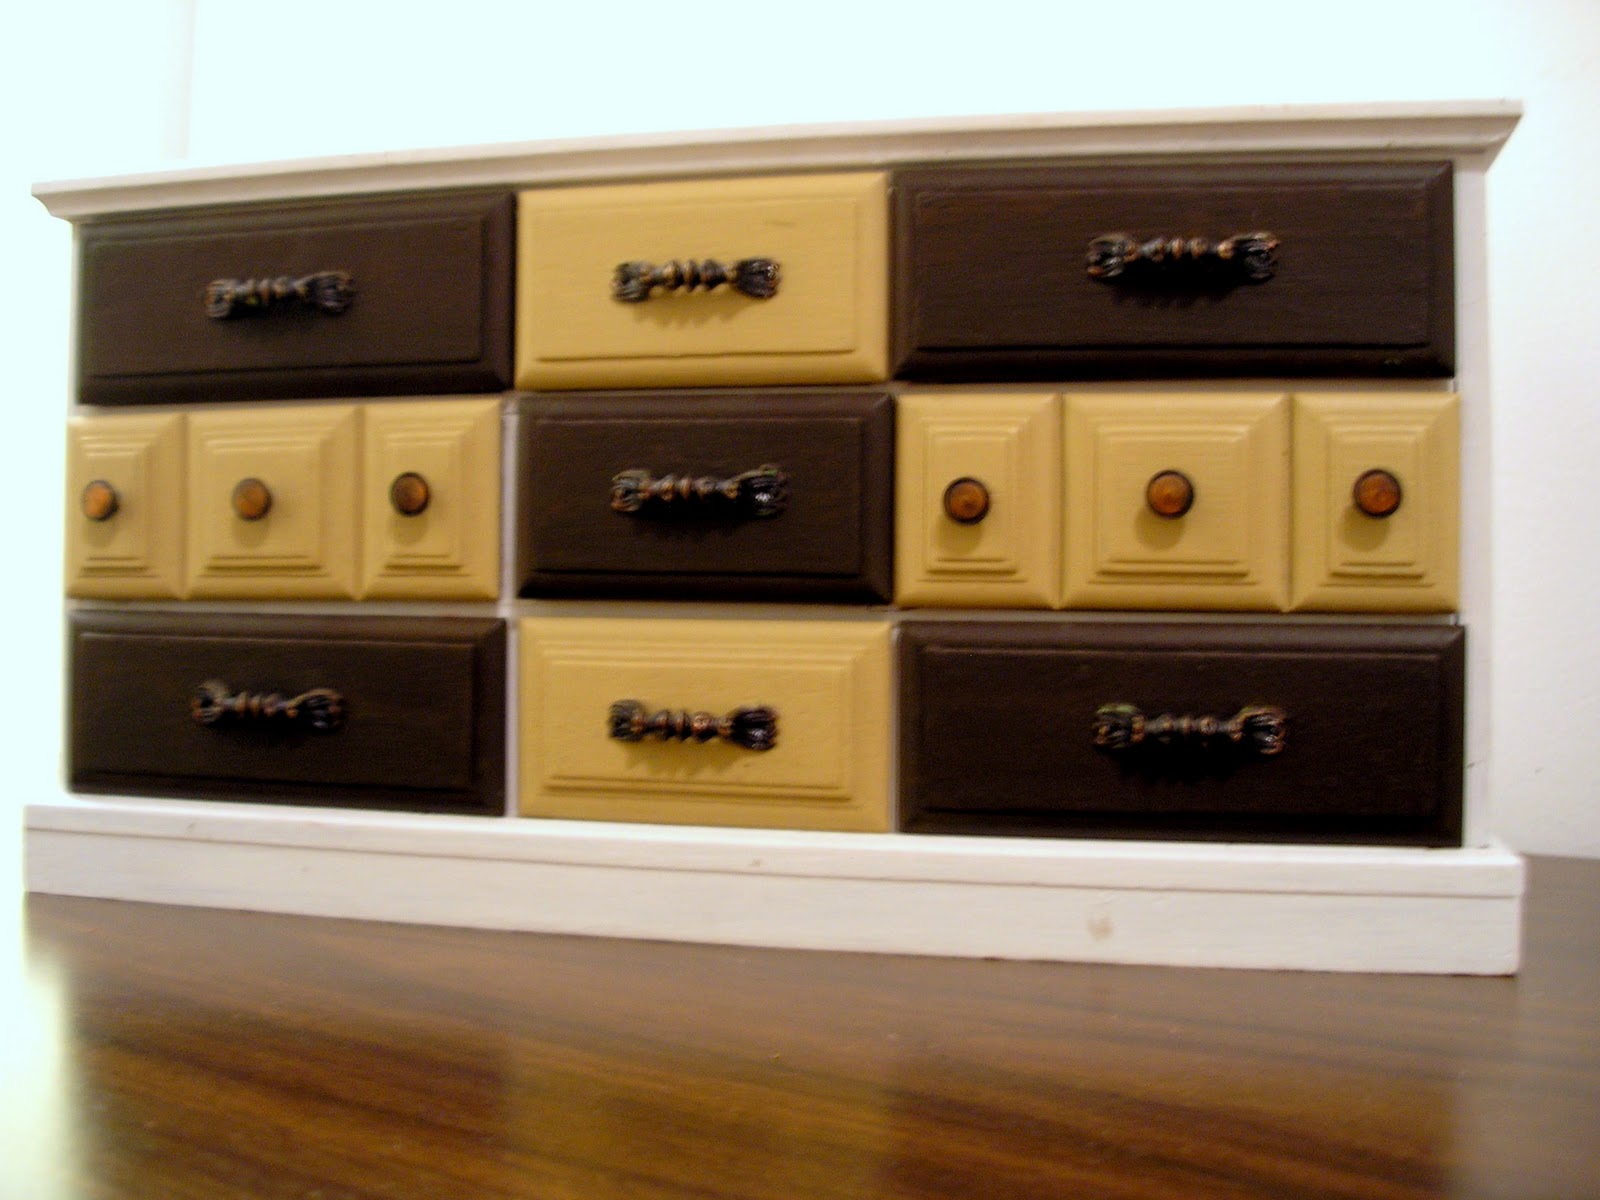
As mentioned in a previous post, I was having a little trouble revamping my old jewelry box. Not being able to find a place for it in my bedroom, I was forced to think of a new use for it. Too small to fit regular desk or sewing supplies, I started pulling out my craft materials to see what else I could come up with. And then it hit me - a bead box! I could color-coordinate my beads and paint each drawer accordingly. It would be perfect. Eventually.


My before jewelry box was WAY boring. My mom got the original dark wooden (?) jewelry box from my great grandma as a gift. I was in desperate need of some extra jewelry storage so she happily passed it down (thanks, mom!). Since then, I've painted the piece according to my bedroom colors - the last paint job was a result of a more muted color palette. 


Once I had the idea, I pulled out my paints and got to work mixing colors. You'd think I'd have something I could work with. 


But nothing worked quite right and I got a very loud and vibrant version of what I was actually going for. Sure I'm into color, but not much. Yikes. I was however, still digging the idea and was positive it would still work out.

So I headed over to Michaels and picked out some Craft Smart acrylic paints with a more muted color palette. At only 59 cents a pop, I couldn't complain. I kept the handles white to keep the piece looking modern and crisp. Aah, much better. 


But I still felt like something was missing. So I headed back to Michaels and picked up some Martha Stewart cherry blossom stickers. I liked the organic shape and colors so I added them to the mix.


I kind of like the way the detailing is 3-dimensional but keep going back and forth on whether to paint the blossoms on to keep it from feeling too "crafty".

If I decide on the sticker route, I plan to attach them better into the crevices of the drawer detailing and then seal with a clear acrylic spray. I'd also like to adjust the stickers a tad more - see how the branch doesn't wrap around the sides of the drawers? I think it looks a little unfinished.

What do you think? Paint or sticker?

Tuesday, October 18, 2011

a plethora of diy costume ideas.

First, thank you Knock off Decor for featuring my jewelry holder!

Second, I'm changing it up today. I was originally planning to show you this fab new use for my beloved jewelry box. I busted out my paints and brushes late last night after volleyball (lost 2, won 1) and got right down to business. Needless to say, I'm not 100% sold on the outcome and need to push the unveiling off a couple days so I can get it right. Waah, waah.

So instead, let's talk Halloween costumes. I know, such a smooth transition of topics, right? Don't get me wrong, I was planning on offering up some ideas, just not today. Actually, nothing I planned for this week has come out as expected. It drives me nuts when things start getting off track. Very uptight of me, I know.

Speaking of being uptight, I've never been a fan of the slutty Halloween costume. I was a slutty rabbit once in college and it was an absolute disaster.
  1. I was so cold it looked like I was convulsing vs. shivering (very attractive, I know)
  2. I ended up looking more like a ragged, balding, famished bunny instead of the adorable, cute and cuddly version I was shooting for (again, SUPER attractive)
  3. I ended up stealing a friend's hoodie to put over my "outfit" because it was freezing, taking off my bunny ears because they gave me a headache and wiping off my little bunny nose because of how many times I needed to blow it (an absolutely stunning sight, I'm sure)
I should pause and mention that I pass no judgement on those that love a good slutty Halloween costume. If you can pull it all together and make something adorable - by all means, go for it. I just happen to be incapable of making it work and am therefore forced to go another direction.

Like Spiderman, a fat tourist or workout Skipper. nbd.

Regardless, DIY costumes are by far the best kind of costumes you can have. Whether it's collected via thrift stores, made out of felt or borrowed from your mom, these types of costumes scream originality, charisma and fearlessness. Here are some of the faves I've found to date on pinterest.

And no, I'm not sharing my actual costume idea. You'll have to wait until the big day to see, folks.

NOTE: Most of these are kid's costumes that you could put a fantastic twist on to make more adult-friendly. People just seem to have more fun dressing up their little ones instead of themselves I guess.

Happy crafting!

[roy lichtenstein pop art: a yellow wig, lots 'o face paint and 80's gear from a thrift store]

[a lamb: white hoodie, black leggings and cotton balls. get someone to be mary!]

[owl: turtleneck, felt "feathers" and a bird mask]

[bee hive: you can really play up you're hair for this one!]

[bowl of spaghetti: yarn, plaid table cloth and some sort of giant bowl]

[octopus: tube socks, stuffing, a thermal and stocking cap]

[bob ross: my friend did this one year. get an afro, some happy clouds and you're all set]

[paper doll: cardboard and paint]

[goose: cardboard, aviators and a sweet satin jacket]

Tuesday, August 16, 2011

Getting my craft on, soon.

This post is kind of random but I can't help it. But I'm SO EXCITED.

Long story short, my BFF Jen and I have a craft night (that's right, a craft night) every so often when we come up with an idea we simply HAVE to make - like this jewelry holder. Or these pillows. Or these stuffed animals.

Well, we've come up with yet another craft - which of course I'm not going to reveal just yet - that involves CRAFT CLAY & SHRINKY DINKS! That's right, our mature, professional (totally kidding) arts and craft sesh is moving down to 5th grade level for a night. Can't you see why I'm so excited now?!?!

Anyway, since I'm not going to tell you the exactly what we'll be making, I started searching around pinterest to see what else can be made (or bought) using this awesome material. Who knows - maybe it'll be a two-parter.

owl magnet - 4 crazy kings

patterned plates - fiskars

vase accessorizing - ideas mag

cat ring - greenmot

pet tags - martha stewart

mobile or windmill - Three Eggs

Thursday, June 3, 2010

Always know how to make an entrance.

Or a reappearance! With a new computer in tow and a laundry list of topics, I am finally back in action. And what better way to kick things off again than the topic of entryways.

Typically overlooked, the entryway is probably the most important part to a home. It's the first impression, summarizes the home's style and the space that, once you step into it, confirms you are in fact home. 

FAKE IT: That said, even if you don't have a foyer, still make sure to section off an area for people to gather. Section off according to room size and available space. If you are extremely low on available space (like me), one suggestion would be to angle the couch so that it provides a sense of direction. 

The space should be inviting and contain some key items: coat rack (or closet), shoe mat and key holder. If you have the space, it's always nice to hang a mirror so you can give yourself the once-over before leaving and your guests can do the same before coming in. It's also nice to display some sort of signature piece whether it be furniture or artwork, that signifies your personal style. Here are some great foyers and entryways for inspiration.