Showing posts with label workspace. Show all posts

Monday, April 2, 2012

a bright new hutch.

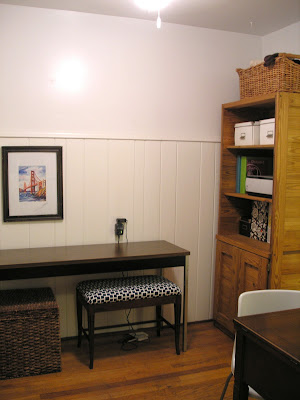
Yet another piece of furniture I've had since I was little (dresser makeover posted here). This hutch (from This Ends Up) was great on storage but light on style. The combination of the simple shape and natural wood made this piece boring, dull and an eyesore.


It took me forever to make up my mind, but I finally ended up painting it with Ace Hardware's Fast Fortune. This turquoise hue added some character to the piece, brightened up the space and created some much needed drama to an otherwise boring, narrow workspace. 


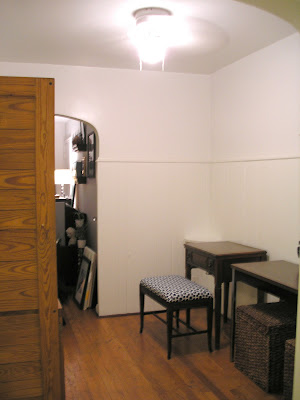
Unfortunately, the rest of the space is still under major construction so I'm a little confined as to what shots I can take of it at the moment. Better photos should be coming soon.

To be honest, I didn't even bother sanded or priming the piece. I chose a flat finish, added two coats and sanded the edges and corners for natural-looking wear and tear. To accomplish this, I simply took a sanding block, gave the entire hutch a sand to bring out the raised wood grain and added more pressure while sanding over the corners and edges in certain places. Every so often, I would step back, assess the "wear and tear" and then sand wherever I felt needed more distressing. My hope is that over time, the piece will continue to age and distress organically. 


Because of the new desk, I was able to stick the printer inside the closed doors, leaving plenty of room for my interior design books, box of interior magazine clippings and the gazillion magazines I collect each year. I organized the books by color and stacked the magazines vertically and horizontally to create a composition that's both functional and pretty. A jar of seashells from my beach vacations finish the look.

Friday, March 30, 2012

fab room friday: a functional workspace


why it's fab
  • floor-to-ceiling built in bookcases (fake the look by pairing a few Billys next to each other!)
  • cork board chock full of inspiration
  • woven trash can to add texture (get the look here on Amazon)
  • worn dining room table as desk
  • light wood chair for a natural contrast
  • white flooring keeps it bright

Monday, March 19, 2012

a thrift store desk makeover.

As I mentioned in my last post about thrifting, you can run into some ridiculous sales. Like the 50% off everything last Saturday at the Loveland Goodwill. This is where I scored this little gem for $18. I fell in love with the simple shape, tapered leg and drawer detail. But, like most things at the thrift store, it was in desperate need of some TLC. The orange finish and the laminated counter top weren't going to cut it. 


So I set up post in the front yard of my apartment building and got to sanding.  For the record, I hate, hate, HATE the fact that I have to sand in the front yard of my apartment but there's just no other option. I've learned to bite my lip, embrace the hillbilly-ness of the situation and try to get everything sanded as soon as humanly possible. I don't get embarrassed that easily but when you're sweating profusely with people are honking and yelling at you while dressed in the world's rattiest clothing in the front yard on a busy street, something has to give. And it's certainly not going to be the orange desk. 

Anyway, I sanded everything down similar to last week's dresser makeover. I used the same MinWax Dark Walnut Stain for the body of the desk and the Valspar Bistro White paint to finish off the top. Since the top was white laminate already, there wasn't much I could do besides painting it. I lightly sanded to make sure the paint would stick, primed and painted the top and the sides to make the transition have a little more purpose. I finished off with three coats of MinWax Polyurethane to give it extra durability and prevent chipping. Finally, I gave the original knobs a thing coat of gold spray paint to complete the look. 


Ta da! I mean, how cute is she?!?! I have a chair downstairs that needs a slipcover and the desk obviously still needs to be accessorized, but I am loving the update to the space. The white desktop actually works perfect with the white shelf, making the two pieces feel like one. I plan to introduce more color with various patterns and replace the current photos with something a little more eye catching. Aside from that, I am so happy with the way everything turned out and look forward to finally getting this space pulled together!

Wednesday, February 22, 2012

workspace in progress.

I have to admit, I'm pretty proud of myself. Last weekend, I was crazy productive and started putting together my workspace (finally!). I was focused, determined and confident in how I wanted to pull it all together. Knowing it's a work in progress, I thought I'd share some shots to at least prove there isn't a pile of junk spanning across the entire area anymore. I still need to choose artwork and refinish some of the furniture but I'm really happy with how things are shaping up.

The biggest tip? Make sure to surround yourself with storage, inspiration and things that make you actually want to be there. After all, at the end of the day - it's still a place for work which can keep you from hanging out there.

[canvases are being changed to softer paintings with a lot of white space]
[most of the frames were spray painted white - still toying with whether to paint the two frames white]

[two cork boards on either side of the space for posting]

[canvas on the desk actual hides the power cords and internet]

Like I said, it's still a work in progress. I'm planning to tone down the artwork a lot - keeping the overall composition soft, minimalistic and filled with pastels. I want the environment to be serene yet inspiring. Like all my rooms, I don't want it to look completely pulled together because to me, that's boring. I feel most comfortable when things are a little disheveled and full of personality. Kind of giving off the same vibe as these spaces.


I've been browsing through my new favorite artwork site, society6, for some investment planning and inspiration pieces. The only thing that stinks is that I'm still on the hunt for a site with 4x6 and 5x7 pictures - anyone have any go-tos they're willing to share? Here's are some ideas I have for the artwork so far. 


As mentioned before, I'm also planning on refinishing my desk, the hutch (not pictured) and (maybe) my sewing machine. I have a couple of options up my sleeves but I'm still figuring out how to execute. I also managed to swipe a chair from the side of the road (yep, I'm that girl) that I plan to recover and refinish as well. 

As you can see, I'm headed down the eclectic road again, keeping the clutter balanced and manageable with a lot of white and repetitive shapes and color. I'm still tinkering around but hopefully I can pull together the final look within the next couple of weeks. 

What do you think so far?

Wednesday, October 26, 2011

workspace layout and artwork.

As mentioned in a previous post, the next step in my workspace revamp was to "try on" both options. I was moving, dragging, pulling and pushing. Good thing I bailed on working out after work.

First up, the good on paper option.


Looks like a decent option right? Let's check it out real-life. 


Mind you, no matter what layout I try on, the space is still going to look ugly because it's not accessorized properly. But aside from the accessories, this layout still isn't working for me for a couple of reasons:
  • the hutch ends up looking crammed in the corner
  • the furniture still looks like it's there to fill space
  • the sewing machine now looks like a place for timeout 

Second, the alleyway option. 


This one looked kind of meh. But after taking a look at the real deal, it started growing on me. 


I like the long row of working space and the opportunity for hanging an awesome photo/inspiration wall that will end up adding height and visual interest. The hutch completely blocks the side of the fridge and makes the space feel much warmer and less forced. I'd like to get some different seating as these rattan cubes are currently my coffee table and paint them and the legs of the desk all different - but complimentary - colors. 

A couple of things that are still driving me nuts:


I mean, what is this? In the corner of the room for what I think used to hold a home phone, I wish I could grab a sledge hammer and remove it. 


This is the only outlet in the space and it happens to be in the middle of the main wall. I need to keep my router, printer and sewing machine all plugged into there so I needed to come up with some kind of solution. So I tried my new desk organizer


Well that looks a little awkward all IN THE MIDDLE of the desk . So, imagining a bunch of other pictures hung on the wall, I tried leaning a canvas up against the wall to cover. And success! While I'm way, way, WAY over the chevron, I think the canvas lean seems much more natural and takes up much less desk space. Plus, I just so happen to have plenty of options on hand. 


So what's the whole wall display going to end up looking like? Here are some options I pulled from pinterest to help decide. 


Tuesday, October 25, 2011

when in doubt, paper drawers.

I am on an organizing mission I'll-tell-you-what. Ok, maybe it's more like a container makeover mission with small spurts of organizing to make me feel better about myself. I mean, I got my beads organized right?

Taking inspiration from my now bead organizer, I decided my other set of small drawers could use a little loving. In the form of scrapbooking paper.


Going back to my workspace rant from yesterday, I knew I wanted yellow to accommodate compliment the kitchen tile and blue to blend in with the living room and (almost forgot) newly upholstered bench. Then, since apparently I'm into the whole pattern on pattern thing (see my bedroom and bathroom), I thought I could use a little in this space as well.

So I took a look around the room to see what I could update. Behold, the infamous Ikea drawer set.


I'd painted it white, beige and black while on a bit of a neutral kick so it was definitely due for a makeover. I headed over to Michaels and picked up some scrapbooking paper. I wasn't terribly impressed with their collection but I think I found some paper that worked.


Then, the rest was easy. I quickly traced around each drawer and cut out the shapes. Totally moron-proof, right? WRONG.


Mental note: patterns do not look the same when traced from all angles. D'oh!

After getting all the cut-outs right, I made my little glue shapes and blended them all around the entire drawer surface. For those that didn't know, glue shapes are similar to ketchup and/or mustard shapes you create while adding the toppings to your hamburger. For those that don't know what a ketchup and/or mustard shape is, this blog may not be for you.

Here's 1) my favorite glue shape and 2) the glue shape smeared all over the drawer surface.


From there, it was time to afix and dry. I used the old heavy-book-overnight-method to keep the paper from curling off and the rest was history. A simple, graphic update to add some punch to a workspace.


all photos courtesy of yours truly.