
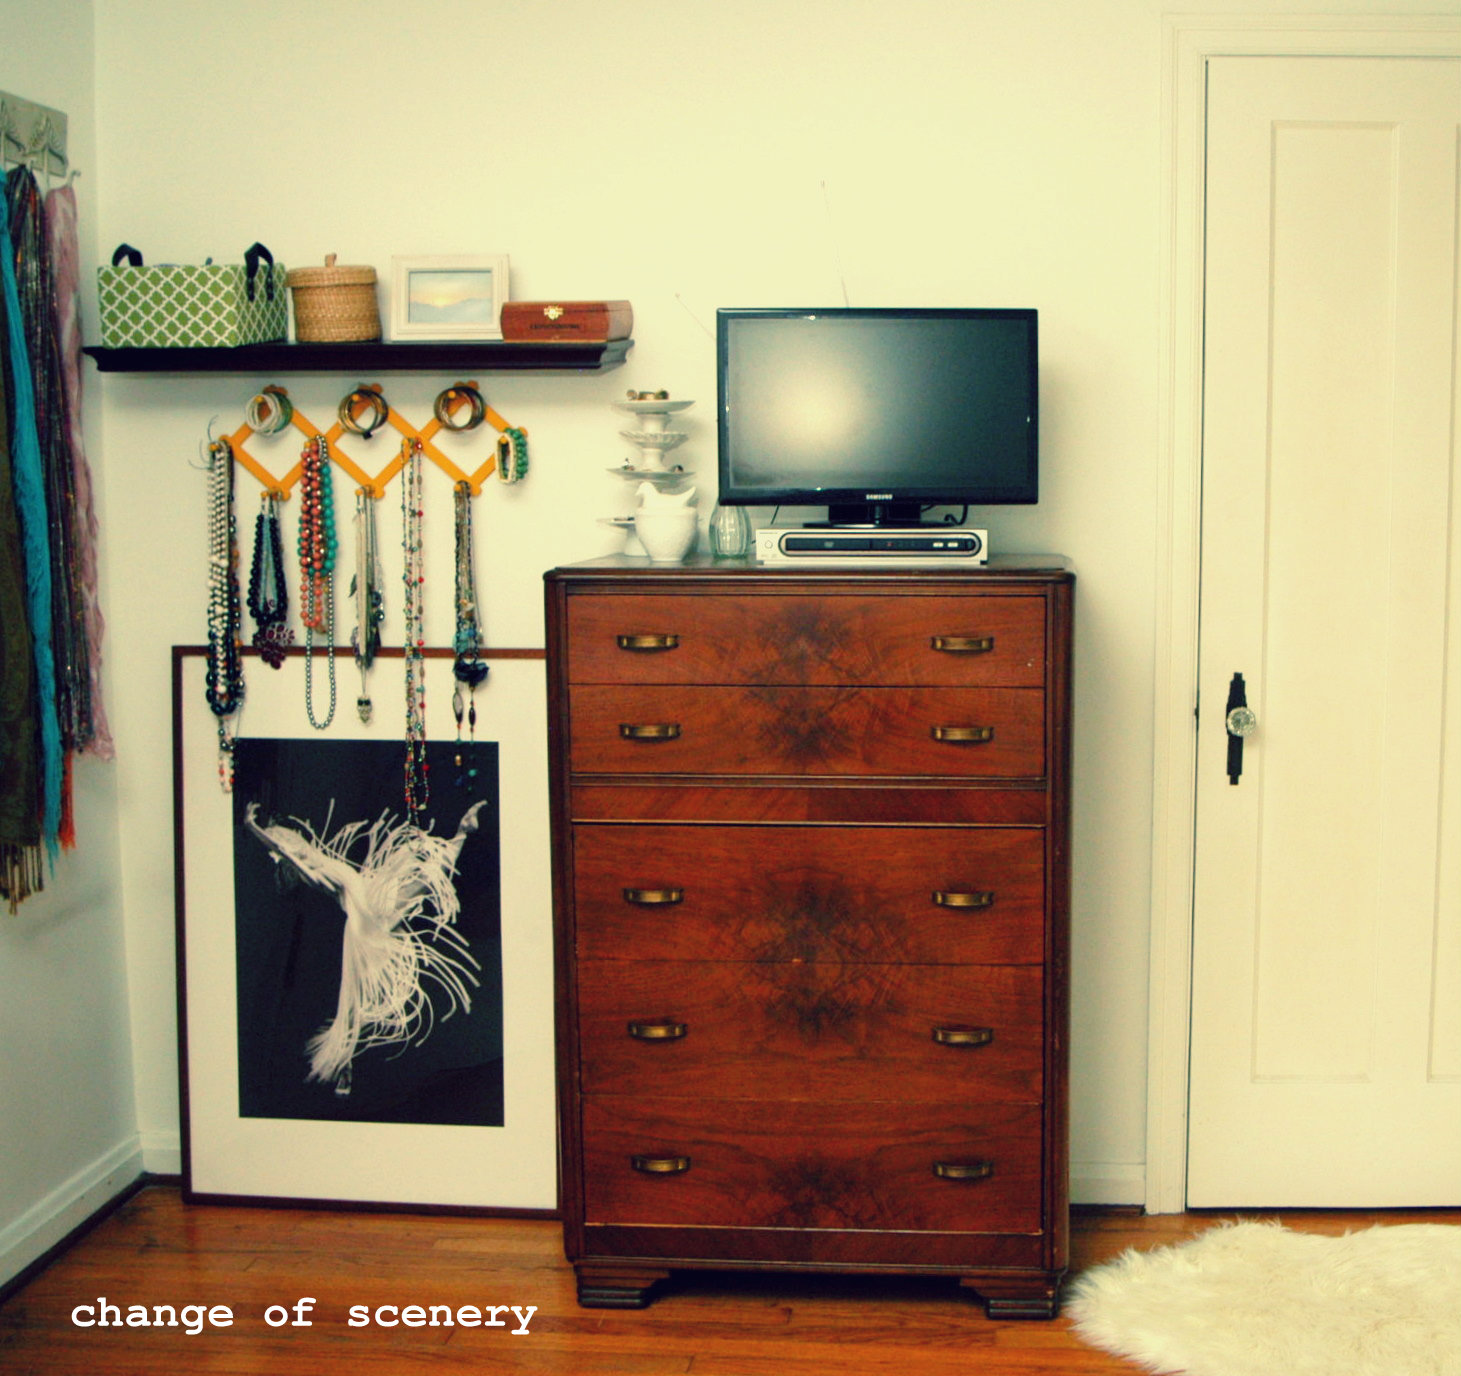
It's finished! The debate was long, the decision was scary but the end result proved totally worth it. This dresser looks polished, current and like a brand new piece of furniture. I am obsessed with it.

To remind everyone, my childhood dresser was in desperate need of a makeover. The hardware was tarnished, the stain was really dark and red and the finish was super glossy. It looked really clunky, chunky and... well... old.

Interested in the technique? Here's how I did it.
priming the dresser
I lightly sanded the dresser, removing that shiny finish so the paint would stick. I didn't worry about taking the actual stain color off since I was only painting over it. Then I applied two coats of Bulls Eye primer. Hindsight, I probably should have worried about taking off the stain since it was such a dark color. Dark color = many coats of paint.


painting and sealing the dresser
I applied three coats of Valspar's Bistro White in Eggshell finish. For the record, whites are really hard to pick out, especially when adding a stained component to the piece. Depending on the tint, the white can pull reds, grays or yellows from the stain. This can make either the white or the stain appear too warm or too dull. To avoid, grab your stain swatch and your paint swatch and pair them side by side. Be sure to look at in sunlight, sunset and with the lights on to make sure the color doesn't change into something funky. Finally, I sealed the paint by using MinWax's Polycrylic to prevent paint chipping and add a level of protection and high gloss.


I sanded down the drawers, taking off all of the finish and the stain. This gave me a clean palette to apply the new color. I decided on MinWax's Dark Walnut because the color was rich without being overly red. I used a brush to apply the stain and a towel to rub in and make even. Finally, I sealed the stain with MinWax's Polyurethane in a satin finish.


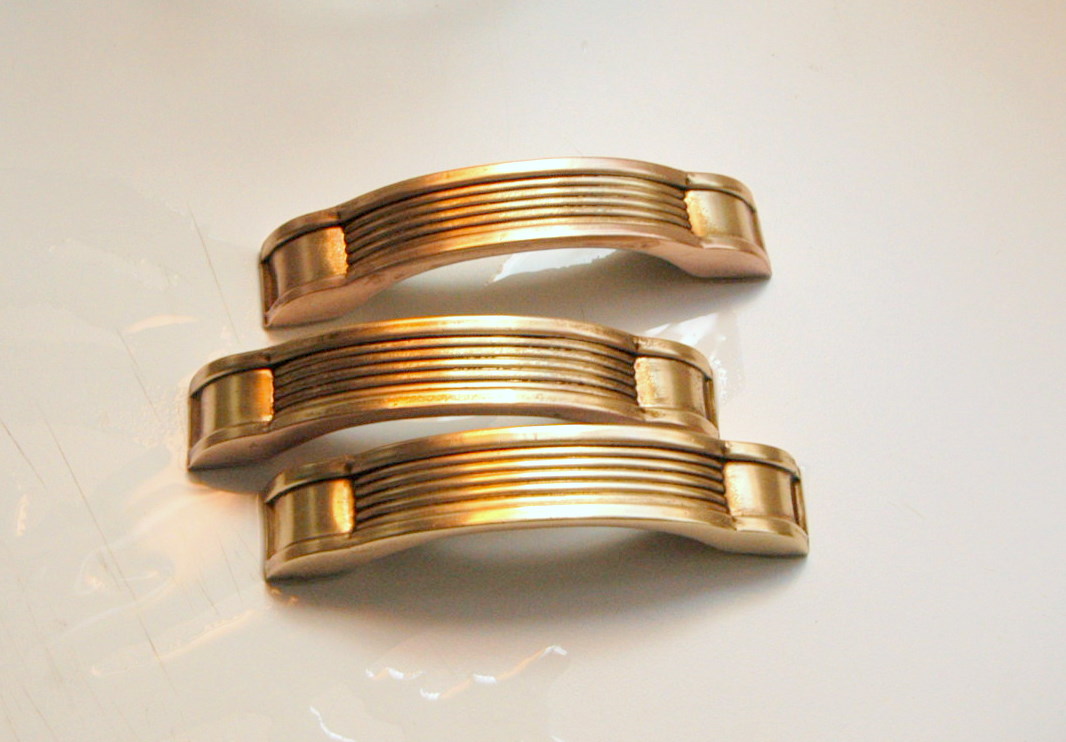
cleaning the hardware
This is probably my favorite part of the transformation. Part of me wanted to keep the tarnished brass hardware as is to give the piece some depth but the other part really liked the idea of shiny handles. So I bit the bullet, bought the infamous Bar Keepers Friend cleaning product and scrubbed away. The end result was seriously night and day.


It looks so amazing!!!!!! Love the wood with the brass. You were busy this weekend lady!
ReplyDeleteWOW, I really like how it turned out. I have a gallon of Behr White paint that I used on a set of twin beds just waiting to be openned again!
ReplyDeleteThanks for the motivation and step by step instructions!
Hello, I've just stumbled upon your blog and I can't stop ADMIRING your handy work! It's insanely GORGEOUS! I just LOVE the end result!! I'm a sucker for any design makeover and always do bits and pieces myself but nothing like this! Uber cool and awesome! Keep up the great work!
ReplyDelete