A while back one of my new Sacramento girlfriends asked if I would help her refinish a piece of furniture. She was in the market for a dresser, her heart set on something with a mid century modern look that could be transformed into something modern and fresh. So I sent her off to the Sacramento Antique Faire with a couple of pointers:
- Ignore all things cosmetic. This means finish, paint and even knobs or handles - it can all be refinished to fit your style. Focus on the shape of the piece and find one that you like.
- Make sure it's wood. Unlike some people (Grampa!), I'm not afraid of a little wood veneer. Open the drawers and look to the back side of the piece of furniture to check for signs of real wood.
- If it's solid wood it will 1) be extremely heavy and 2) not have any signs of stacking or seams between any of the wood used to build the piece.
- If it's wood veneer, there will look like a separate piece of wood as the face panel however, the cover should still feel like wood. The easiest way to find this out is to find the blemishes to see how it wears away. If it looks ripped, then chances are the piece is laminate. If it looks more chipped or water damaged, you most likely have yourself some wood veneer.
- Give it a jiggle. While some loose screws can be tightened, stay weary of any piece of furniture that seems clearly broken. It's not worth it. Trust me.
So after all that, Debra ended up with this gorgeous piece of mid century modern history. And by gorgeous, I mean r-o-u-g-h. Scuffs, dents, the whole nine yards.
Condition aside, Debra really did take the tips and applied them wonderfully. The shape was gorgeous. All wood veneer. No structural damage. All for $125. It really was a fantastic find. Stunning.
So first things first, we decided that this dresser could really have a moment if we were to stain it a really deep, dark color. It would really make a statement, warming up any room while adding a sense of richness.
So we started sanding.
Until all of the finish, scuffs and scratches were removed and color was even. And actually, wood veneer isn't as delicate as some may think. It's thick enough to handle some pretty heavy sanding so feel free to give those scratches and scuffs hell. To make sure you're not sanding off the veneer entirely, check to make sure the color doesn't get drastically lighter. This means you're entering plywood territory which doesn't take stain nearly as well.
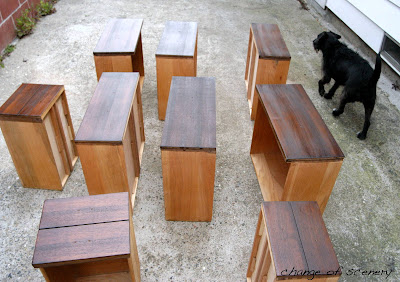
Once the dresser was completely sanded, we actually washed the piece of furniture really well using some damp rags. This helps remove all the excess sawdust, giving you a smooth surface to paint your stain on. Just make sure to leave enough time for the piece to dry. Ruby got a little impatient on this step.
After all was cleaned and dried, we started brushing on the stain. This is the time where I mention there are "different strokes for different folks". I'm of the brush and wipe camp - painting on a little bit of stain and using an old wife beater to rub in/off any excess. Regardless of your tactic, the most important thing to remember is that a little goes a long way. We used MinWax's Dark Walnut. Cute, right?!
Two coats of the stain and one coat of MinWax's Clear Satin Polyurethane and the dresser was complete. We brushed off any flaking finish off the original handles and sprayed with Rustoleum's Oil Rubbed Bronze to maintain the rich, warm feel the stain provided.
Debra ended up finding a circular mirror with an ornate frame we're still trying to figure out what color to spray it with. Adding some metallic and floral accessories will add the perfect balance to this now adorable piece of furniture.


Dogs normally can get in the way but I see Ruby was a big help.... she really is an impatient kind of dog.
ReplyDelete