Ladies and gentlemen, the weekly update of the dollhouse build is here. But first, a message brought to you my my non-sponsor, Elmer's Wood Glue.
That's right, me and Elmer have gotten to know each other pretty well over the grueling process of laying down a popsicle stick floor. And the good times aren't finished considering my plans to lay "hard wood" down in the bedrooms and workspace areas. Here are some shots of the grueling process below.
See how little those popsicle sticks are? The process went a little like this:
- dribble glue in a line, smear across to form a thin layer
- lay popsicle sticks one by one, trim the last stick to fit
- repeat
- tape any parts of the floor that jut out or start to slip apart from popsicle stick warping
- let dry
Sooo boring. Like claw my eyes out boring.
But in the end, it was totally worth it.
How pretty is that?! And, to kick it up just one more notch, I stained it dark. First with Early American (Ace brand) and some shadowing and character building with Dark Walnut (MinWax).
I mean, how ridiculous does that look?! I plan to add some white molding around the edge and windows to finish the look - it's just in the process of drying. The stain really helped almost compliment the imperfections of the flooring and adds a layer of character that's perfect for accessorizing around.
Onto the second floor. Here's the floorplan.
First, the bathroom.
I've been really inspired by a couple of navy blue baths lately. I love the deep, rich color in a room that's so often white or pastel. I plan to tone down the masculinity of the color by adding natural materials like a wooden dresser vanity and a cheesecloth shower curtain. Next, I plan to brighten up with some pops of color similar to the spearmint or yellow shown in the pictures.
I bought some mosiac tiles and planned to get to work on the floor once I finished painting. Definitely need way more tile than originally expected. D'oh.
Second, the kid's room.
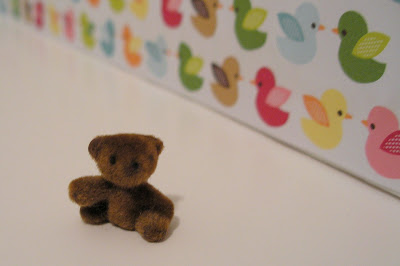
I fell in love with the scrap booking paper I ended up using as wallpaper. The robin's egg blue acrylic helped soften the bright colors in the paper and bring the room together. Then, my friend Jamie gave me the miniature teddy bear below and things just got even more adorable.
Even though I like the way this turned out I'm kinda-sorta thinking of adding another patterned wall to the space to make it a little more unexpected. Like this room but less bright.
Finally, the workspace.
It doesn't seem like much but I needed to keep the other walls white to balance the bright mustard focal wall. I'm 50/50 on the wall color, which was based on the color palette in the picture below.
Fun, bright but still warm and almost neutral. I have however, been drooling over this color palette for almost the same amount of time. Maybe I soften the wall to a buttery yellow instead? You'll notice that all of the other colors I've painted to-date match what's represented here. I plan to paint the master bedroom taupe and possibly the master bath either the coral or the dark teal.
And there you have it! My progress this week. Oh wait, I cut out the walls and floor for the third level (master bed and bath).
Next up? Figure out the GD stairs (SOS BILL!). After around, oh, I don't know, FIVE failed attempts I'm about to just create a dollhouse for a flying doll family vs. one that walks around. It's way better than having a meltdown over it.
Other projects include the second level flooring, assembling the third floor, painting and wallpapering the third floor, making a SECOND staircase, adding the third level flooring, adding the molding and figuring out the roof.
Phew! With only 5 weeks left until the I'm a Giant Challenge deadline, I better put this booty in high speed. STAT.


Beautiful floor!
ReplyDeleteOMG, those floors are gorgeous. Thanks so much for sharing all of the (albeit tedious) details. Your work really paid off, the dark stain finish is fab.
ReplyDeleteWhat tool did you use to cut the ends of the sticks?
ReplyDeleteThis is a great blog! Keep sharing more. https://www.groundeffects-ltd.ca/
ReplyDelete